

Sometimes you don’t need a whole cake—just the perfect little one. Meet my Mini Chocolate Cake for Two! Ideal for date night, a cozy Valentine’s Day dessert (complete with an optional chocolate heart), any special occasion, anniversaries, or anytime a chocolate craving strikes without committing to a full-size cake. This decadent mini cake is topped with luscious chocolate frosting and finished with decorative vanilla buttercream, delivering big, indulgent flavor in a perfectly portioned treat.
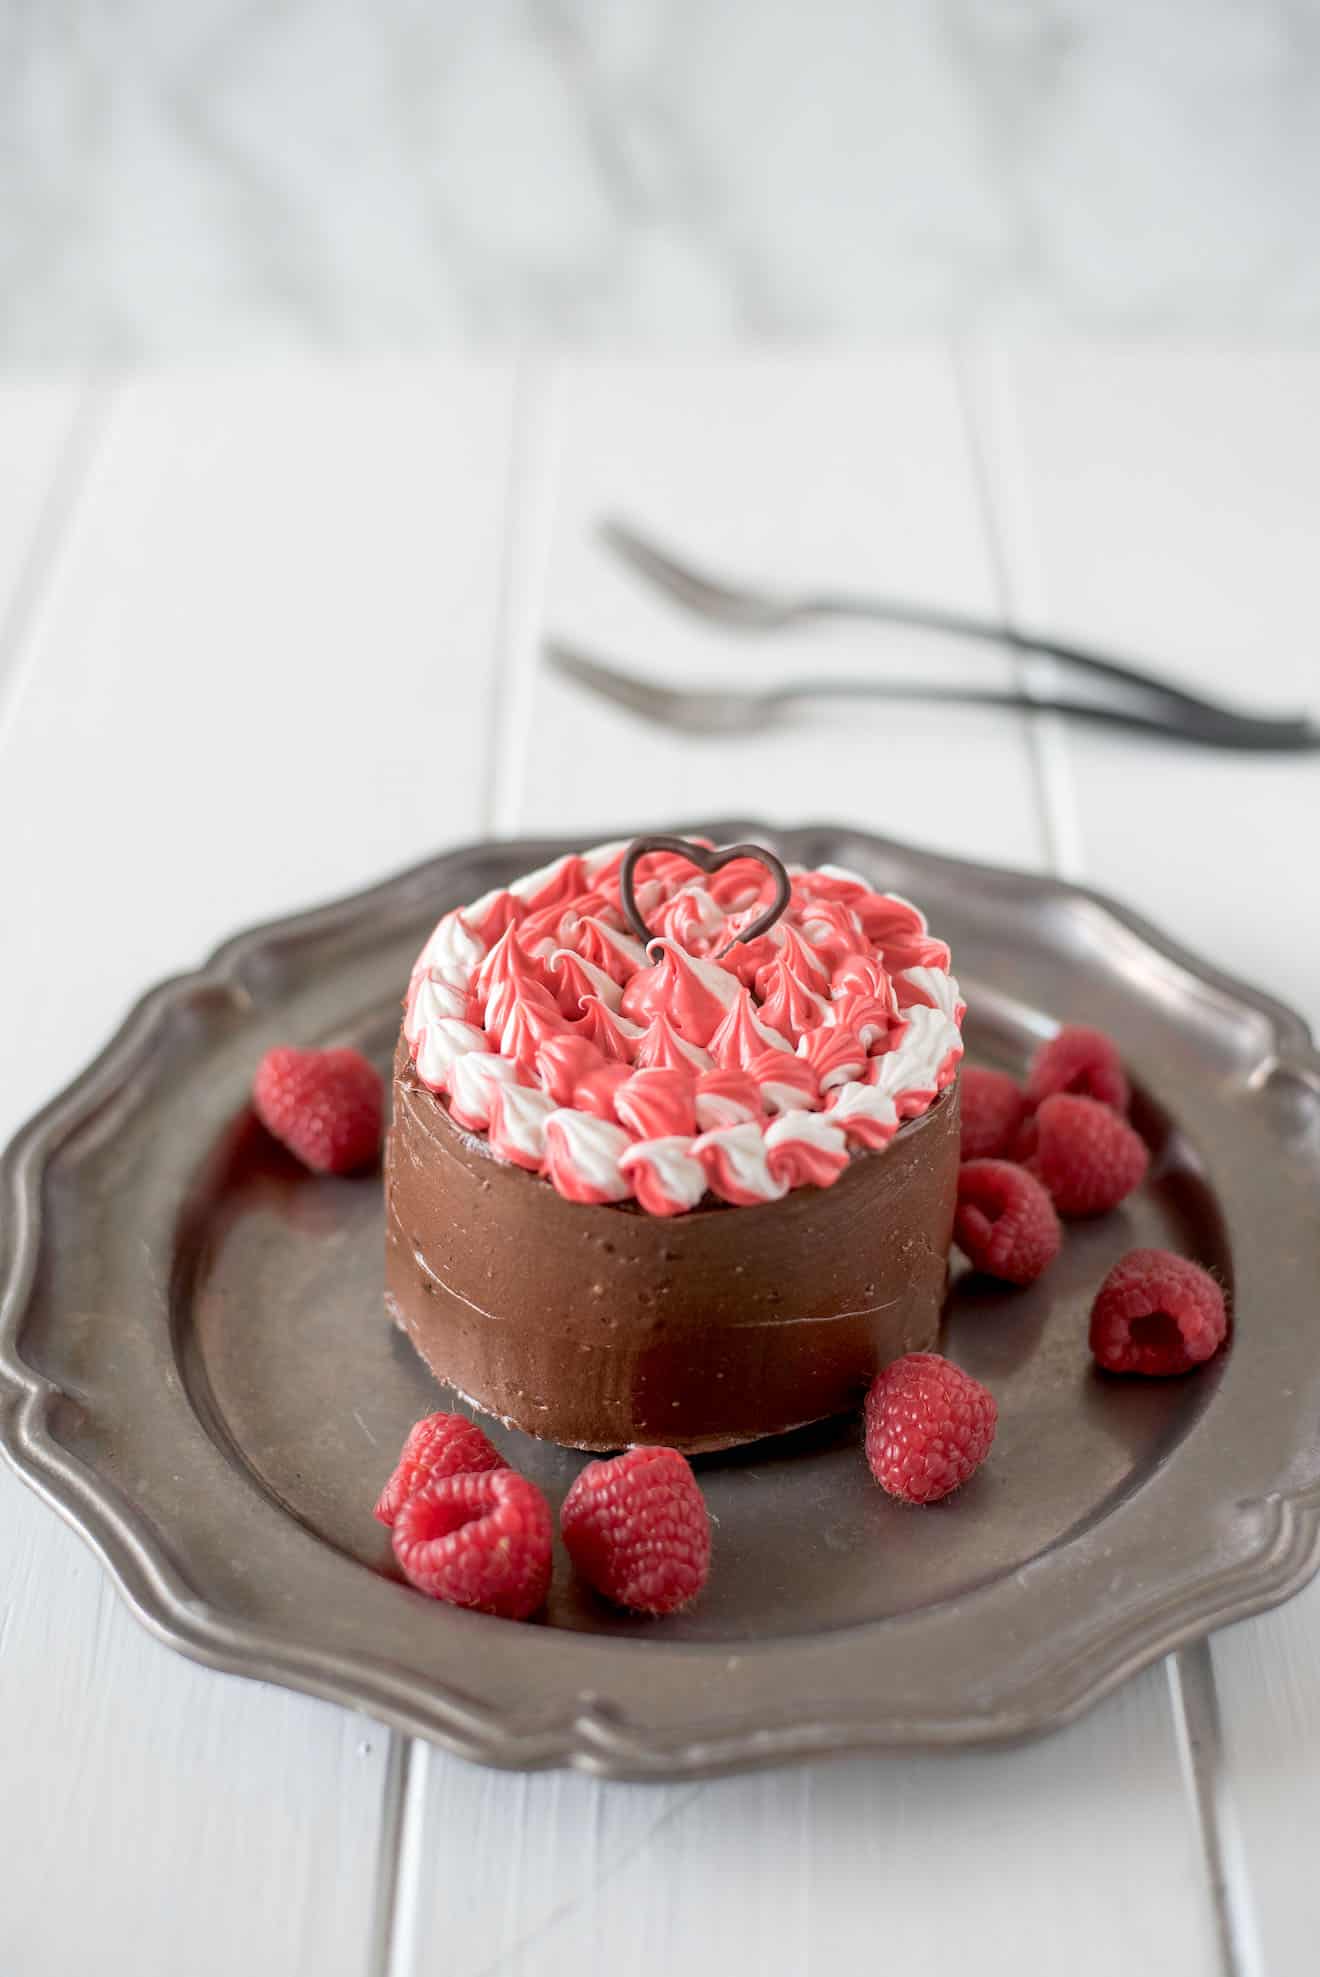
How cute are small cakes? This mini chocolate layer cake features two thick 4-inch cake layers, making it the perfect size to enjoy solo—half now and half tomorrow. Balance! And if you’re feeling extra responsible, you can even freeze the rest for later.
Real chocolate in cake
To get the best chocolate cake, I like to make it with real melted chocolate (70% semi-sweet)—not baking chocolate, just really good chocolate you’d happily eat on its own.
The higher cocoa percentage enhances the bold chocolate flavor while still containing enough sugar to prevent bitterness. Its smooth texture melts beautifully into the batter, creating a moist, fudgy crumb. This cake also includes unsweetened natural cocoa powder for an extra boost of rich chocolate flavor.
Chocolate Buttercream Frosting
I also like to use real melted chocolate in my chocolate buttercream frosting—it adds a deep, rich chocolate flavor. While you can use chocolate ganache, you’ll want a proper frosting if you plan to pipe decorations on top.
Buttermilk or whole milk
I prefer using whole milk in chocolate cake, as it keeps the flavor rich and pure without the tang that buttermilk can add. That said, buttermilk is a popular option and can usually be swapped 1:1 for regular milk in chocolate cake recipes if you enjoy a slightly tangier, more tender crumb.

Cake size
This recipe makes two thick 4-inch (10 cm) round mini cakes. You can also use two 6-inch cake pans—they won’t be as tall, but they’ll be just as perfect. If using larger pans, reduce the baking time slightly. I like using springform pans, which make removing the cakes effortless.
How to evenly divide cake batter between 2 cake pans
The easiest way to get even layers is by weighing the batter. First, place each empty pan on a kitchen scale and zero it out. Then, pour batter into each pan until they weigh the same. Even layers bake more consistently and stack beautifully, giving you a professional-looking cake every time.

Flat top cakes
Cakes often develop a domed top as they rise. Before frosting, shave off the dome to create a flat surface—and enjoy a little sweet treat while you’re at it! A flat top keeps the second layer even when stacking and makes piping the final frosting much easier.
Cake frosting tips
- Place pieces of parchment paper under the edges of the cake. This allows you to frost it on the surface you plan to serve it on without making a mess—simply pull the paper out afterward.
- Apply a crumb coat (a thin first layer of frosting) to set the surface, creating a firm, smooth base for the final layer. The crumb coat seals in loose crumbs and prevents them from mixing into the outer frosting. Chilling the cake after the crumb coat helps the butter or fat in the frosting firm up, making it easier to apply the final coat without smudging or dragging crumbs. Using an offset spatula will help you achieve a perfectly smooth surface.
Two-tone frosting
Just like with my Key Lime Cupcakes, I use two colors of vanilla buttercream frosting in a single piping bag to create a beautiful two-tone effect. To do this neatly, first place each color in its own piping bag. Then, insert them side by side into a larger decorating bag before piping onto the cake. You can use vanilla buttercream or cream cheese frosting for this technique.

Knowing when cakes are done
A cake is perfectly baked when it’s set and the top is not shiny. I should spring back when gently pressed in the center. A toothpick or skewer inserted into the middle should come out clean or with just a few moist crumbs—no wet batter. The edges will also begin to pull slightly away from the pan, and the cake should smell fragrant and baked, not doughy.
Keep in mind that baking time can vary depending on your oven and the color of your cake pans. Dark-colored pans retain heat more efficiently and tend to bake cakes faster, while lighter-colored pans reflect heat and may require a slightly longer baking time. Always cool fully on a wire rack before frosting.
Make ahead mini chocolate cake recipe
Make the chocolate cakes a day or two in advance. Once completely cooled, wrap them tightly in plastic wrap and refrigerate for up to three days or store at room temperature for up to two days. A frosted cake will stay fresh for three to four days.
High altitude cake baking
This cake stays moist and fudgy, making it perfect for high-altitude baking. The drier air and lower pressure at higher elevations often dry out cakes, but the rich moisture in this recipe prevents this from happening.
Chocolate cake hack
Not much of a baker? Take a shortcut and buy a box of cake mix. No one will know, just customize with homemade frosting.

Cake decoratin
You can go with my multi-color frosting method featuring a heart, or try my Easy Chocolate Shards (pictured below).
How to Make A Chocolate Heart
Add a cute Valentine’s Day touch with a homemade chocolate heart! Simply pipe a thin line of melted chocolate onto parchment paper in the shape of a heart, then refrigerate until it hardens. For best results, use chocolate meant for eating rather than baking chocolate. For a precise shape, print a heart outline, place it under the parchment paper, and trace it with the melted chocolate.


More chocolate cake recipes

If you’ve made this Mini Chocolate Cake for Two, please leave a star rating in the recipe card. You can also ask a question or leave a comment below.
Prep Time
10 minutes
Cook Time
23 minutes
Total Time
33 minutes
Ingredients
- 2 ounces (55 grams) 70% semi-sweet chocolate, chopped * see note
- For the cake:
- ½ cup (65 grams) all-purpose flour
- ½ teaspoon baking powder
- ¼ teaspoon salt
- 2 ½ tablespoons unsweetened cocoa powder
- 4 tablespoons unsalted butter, room temperature
- ⅓ cup (66 grams) granulated sugar
- 2 large eggs, room temperature
- ¼ cup (60 ml) milk, warmed ** see note
For the chocolate frosting
- 1 cup/16 tablespoons (227 grams) unsalted butter, softened to room temperature
- 3 cups (360 grams) powdered sugar
- 2 ounces (55 grams) semi-sweet chocolate melted and cooled
- ½ cup (74 grams) unsweetened cocoa powder
- A little room temperature milk
For the colored frosting
- 16 ounces (453 grams) store bought white frosting
- Natural red frosting color
Instructions
For the cakes:
- Position the oven rack in the center and preheat to 325°F / 165°C.
- Butter and grease 2 round 4-inch x 2-inch (10 cm x 6 cm) springform cake pans.
- Melt the chocolate: Place the 2 ounces of chocolate in a microwave-safe bowl. Microwave on high in 30-second increments, stirring in between, until melted.
- For the cake In a mixing bowl, sift together the flour, baking powder, salt, and cocoa powder. Set aside.
- In a separate large bowl, beat the butter and sugar until light and fluffy (about 4–5 minutes). Add the eggs one at a time, beating well after each addition, then add the milk and mix.
- Tip: If the mixture looks curdled or separates, don’t worry—it just means the butter and sugar weren’t fully creamed.
- Fold in the sifted flour mixture and melted chocolate until smooth and well combined.
- Divide the batter evenly between the two pans. The easiest way to ensure even layers is by placing each pan on scales and adding the batter until they weigh the same.
- Bake for 40–50 minutes (depending on your oven) or until a toothpick inserted in the center comes out clean.
- Allow cakes to cool in the pans for 10 minutes, then transfer to a wire cooling rack and cool completely.
- Chocolate Frosting:
- Cream the butter and powdered sugar with a hand or stand mixer until light and fluffy.
- Gradually mix in the melted chocolate and cocoa powder, scraping the sides of the bowl to incorporate. If the frosting is too thick, add a little milk. Set aside for 1 hour to firm up.
- Two-Tone Red Frosting:
Divide the frosting between two bowls. Add red food coloring to one bowl until you reach the desired shade.
Place both the red and white frosting into a single piping bag to create a swirl effect when piping. - Chocolate Heart:
Fill a small piping bag or zip-top bag with melted chocolate and cut a tiny corner off. Pipe a heart onto parchment paper.
– Tip: For a precise shape, print a heart outline, place the parchment over it, and trace.
Refrigerate the heart until hardened. - Assemble the Cake:
Use a large, sharp knife to flatten the tops of the cakes. Place one cake layer on a flat surface. Spread a thick layer of chocolate frosting on top, then add the second cake layer.
Place small pieces of parchment under the cake edges to keep your surface clean.
Apply a thin layer of chocolate frosting all over the cake (this is the crumb coat) to seal in loose crumbs. Refrigerate for 30 minutes.
Apply a final layer of chocolate frosting, smoothing with an offset spatula. You may not use all the frosting—adjust thickness to your preference.
Refrigerate for another 30 minutes.
Pipe the red and white frosting on top in your preferred design.
Carefully remove the chocolate heart from the parchment and place it on top.
Notes
* This percentage is just a suggestion. You can use a whatever chocolate you like. Use only chocolate you would eat. Especially for the heart as baking chocolate may not set hard enough.
** I prefer whole milk rather than buttermilk in this as I don’t want the tangy flavor. You can use buttermilk of you like, same measurement. The cakes may rise more with buttermilk as the acidity will increase the reaction with the baking powder.
Step-by-step video:
Nutrition Information
Yield
2
Serving Size
1
Amount Per Serving
Calories 863Total Fat 55gSaturated Fat 30gTrans Fat 1gUnsaturated Fat 21gCholesterol 293mgSodium 710mgCarbohydrates 78gFiber 3gSugar 46gProtein 18g
This nutrition calculation is provided by Nutronix that is only a guideline and not intended for any particular diet.

Janette is a professionally trained chef based in California who channels her passion for cooking into thoughtfully crafted recipes. Her culinary creations are inspired by her English heritage as well as her favorite global cuisines, including Indian and Italian. Connect with her on Facebook, Pinterest, and Instagram for more delicious inspiration. More About Janette…
News
Berita Teknologi
Berita Olahraga
Sports news
sports
Motivation
football prediction
technology
Berita Technologi
Berita Terkini
Tempat Wisata
News Flash
Football
Gaming
Game News
Gamers
Jasa Artikel
Jasa Backlink
Agen234
Agen234
Agen234
Resep
Cek Ongkir Cargo
Download Film


